Wednesday, March 11, 2020

Air Fryer Chicken Tenders


Ingredients:


  • 1 pound chicken tenders
  • 2 cups fried onions
  • 1 cup panko bread crumbs
  • 1 sleeve ritz cracker
  • 1 cup flour
  • 2 eggs
  • Seasoned salt
  • Onion Powder
  • Garlic Powder
  • Pepper
Directions

Crush the fried onions and ritz crackers in a food processor (or put them in a plastic bag and smash them by hand) until they are crumbs. Add the fried onions and ritz cracker crumbs into a plastic bag with the panko bread crumbs and shake the bag to mix them together. Season the chicken tenders with garlic powder, seasoned salt, pepper, and onion powder (or any seasoning of your choice) to taste. 

In a dish or bowl add the eggs and whisk them together. In another bowl or dish, add the flour. Dip the chicken tenders into the flour and coat them well, shaking off an excess flour and then dip them into the egg. After the tender is coated well with the egg, place it into the bag with the crumb mixture. Add about three or four chicken tenders at a time and shake the bag to coat all of the chicken in the crumb mixture. 

Place the tenders on a plate or baking sheet and repeat the steps for the remaining tenders. Place the tenders into the air fry (do not overcrowd the pan) and cook at 350 degrees for 10 to 15 minutes or until golden brown and fully cooked.


Wednesday, October 16, 2019

Apple Butter


Ingredients:

- 8 apples
- 1 tsp. cinnamon
- 1/2 tsp. all spice
- 1/4 tsp. ground clove
- 2 tbsp. fresh orange juice
- 1/4 cup apple cider
- 1/2 cup brown sugar
- 1/2 cup granulated sugar

Directions:

Wash, peel, and slice apples. Place all ingredients in a slow cooker and stir. Cook on high for 4 hours or low for 6 to 8 hours. After the desired cooking time, mash the apples with a potato masher and puree using an immersion (hand) blender until it reaches a smooth consistency. You can also puree the apple in a food processor. If you want the apple butter thicker, cook on high for 3 hours more hours without the lid or until desired thickness is reached. You can also put the apple butter in a saucepan or pot and thicken it on the stove. If you wish, you can can the apple butter. It will last a couple week in the refrigerator in an air tight container.

Note:

You may want to strain the able butter after its cooked.


Monday, November 20, 2017

Candied Yams

Ingredients:

2 pounds sweet potatoes
1 stick butter
1 cup granulated sugar
1 tsp. cinnamon
1/2 tsp. all spice
1/4 tsp.nutmeg
1 tsp. vanilla


Directions:                     

Preheat oven to 375 degrees. Peel the sweet potatoes and rinse them well. Cut the potatoes into desired shape (I prefer chunks). In a pot over medium low heat, melt the butter. Add in the sugar and stir until the sugar is dissolved. Stir in the cinnamon, all spice, and nutmeg. Add in the vanilla extract. Let the mixture bubble, the remove it from the heat and stir in the sweet potatoes, making sure they are fully coated with the syrup. Pour the mixture into a lightly greased baking dish. Cover with aluminum foil. Bake for 1 hour, (or until desired texture is reached) stirring halfway through.

Sunday, November 19, 2017

Simple Roasted Turkey


For the brine:

-          2 gallons of water (more if needed)
-          ¾ cups kosher salt
-          1 tbsp. peppercorns
-          1 large onion, chopped into quarters
-          6 garlic cloves, smashed
-          Fresh Rosemary and Thyme (about 4 sprigs of each)

For the turkey:

-          1 (10 pound) turkey, fully thawed
-          5 tbsp. butter, softened
-          1 tsp. poultry seasoning
-          1 tsp. seasoned salt
-          ½ tsp. black pepper
-          3 stalks of celery, chopped into large pieces
-          1 large onion, chopped into large pieces
-          2 larger carrots, chopped into large pieces
-          2 cups chicken broth

Directions

Brine:
Mix all the ingredients together until the salt is fully dissolved in a large container that will hold the liquid and the turkey. If you choose, you can boil the mixture so that all the flavors can infuse into the water quicker, but make sure you cool it before adding in the turkey.

Turkey:
Rinse the turkey thoroughly and remove the neck and giblets pack from inside the cavity. Place the turkey into the brine and make sure that it is fully submerged in the water. Add more water if needed. Cover the container with the turkey in it and place in the refrigerator for 15 hours or overnight.

Preheat oven to 325 degrees. Remove the turkey from the brine and rinse thoroughly. Let the turkey sit out for one hour to come to room temperature after removing it from the brine. Pat the turkey completely dry with paper towels. Mix the poultry seasoning, seasoned salt, and black pepper together. Season the inside of the cavity with some of the seasonings. Smear the butter over the entire surface of the turkey. Sprinkle the remaining seasoning mixture all over the turkey. If you choose, you can stuff the cavity with stuffing or any type of aromatics you prefer. You may also put the turkey in an oven roasting bag.

Line the bottom of a roasting pan with the celery, onion, and carrots. Pour the chicken broth over the vegetables. Place the turkey on top of the vegetables, tucking the wing tips underneath it and tying the legs together with kitchen twine or even use some aluminum foil (Doing this helps make sure they cook evenly). Place the turkey into the oven and bake according to the chart below, basting every 30 minutes with the juices in the bottom of the roasting pan.

The turkey is done when the thickest part of the thigh reads 165 degrees.

When the turkey is done, let it set for a minimum of 30 minutes before cutting into it.


Notes:


  • You may put the turkey in an oven roasting bag if you choose.
  • You will have to adjust the recipe, if you use a larger turkey.


Sausage Stuffing Recipe


Ingredients:
-          12 cups white bread (about 15 slices) [Or stuffing cubes]
-          1 onion, diced
-          3 stalks celery, chopped
-          2 tbsp. vegetable oil
-          1 pound ground sausage (Italian or Breakfast)
-          2 cups chicken broth (add more if needed for desired texture)
-          2 eggs, beaten
-          ½ tsp ground sage
-          1 tsp. fresh rosemary, chopped
-          ½ tsp. fresh thyme
-          1 tsp. dried parsley
-          Salt and pepper to taste

Preheat oven to 350 degrees. Slice bread in to half inch cubes. Spread bread cubes on a baking sheet(s) in a single layer. Place the cubes into the oven and bake for 25 to 30 minutes, or until completely dried out (keep an eye on them). In a skillet over medium heat, brown the sausage and drain of any fat. Set the sausage aside. In the same skillet, sauté the onions and celery with the oil about 5 minutes or until soft. In a large bowl, add the dried bread cubes, sausage, onions and celery, rosemary, thyme, parsley, and sage. Mix well. Mix in the beaten eggs and season with salt and pepper to taste. Bake for 35 to 40 minutes. Let cool 15 minutes to cool and set.


Saturday, November 18, 2017

Loaded Hash Brown Casserole

Ingredients:

- 1 (1 pound 14 oz) bag frozen shredded hash browns, thawed
- 6 tbsp. butter, melted
- 16 ounces (2 cups) sour cream
- 2 (10.5 ounce) cans cream of mushroom or chicken
- 2 cups shredded cheese
- 1/2 cup diced ham
- 6 to 8 slices of bacon, cooked and chopped
- salt and pepper to taste

Preheat oven to 350 degrees. In a large mixing bowl, mix the hash brown, butter, sour cream, cream of mushroom, and cheese. Add the bacon and ham and mix. Season to taste with salt and pepper. Pour the mixture into a lightly greased 13x9 inch baking dish and bake for 40 to 50 minutes. Let cool 10 minutes before serving.

Tuesday, September 12, 2017

Baked Barbecue Ribs


What's up, foodies? Y'all doing good? You good? You good? I'm good! You good? Okay, good! Today I am sharing my recipe for baked barbecue ribs. Don't get me wrong, I love a good rib that's been cooked on the grill, however, I really don't like grilling....at least not when it's hot outside. If I do grill, I'd prefer to do it during the colder parts of the year..I just don't like being hot.

I have done these many, many times before, but I decided that the next time I make them, I am going to make my own rub to put on them. I have never made any type of rub before and I think I did pretty good on it. I am sure that there is something way better then what I created, but hey, I'm a newbie.

I really love ribs, but I don't eat them that much because I will eat an entire rack (and then some) with no hesitation. You can use your favorite store brand of rub or if you have your own recipe you can use it. I really hope you enjoy this sticky delight.

Ingredients:

- 1 rack of ribs (any type of your choice)
- 1 bottle of barbecue sauce
Dry Rub
- 3 tbsp. brown sugar
- 2 tsp. garlic powder
- 2 tsp. chili powder
- 1 tsp.salt
- 1 tsp. paprika
- 1 tsp. chipotle chili pepper (optional)
- 1/2 tsp.black pepper
- 1 tsp. ground mustard
- 1 tsp. onion poweder
- 1 tsp. meat tenderizer (optional)

Directions:

Preheat oven to 300 degrees. Mix all of the rub ingredients together until everything is well combined. Remove the membrane from the bottom of the ribs (if you choose- see video). Generously rub the dry rub seasoning all over the ribs (you will have extra). Wrap the ribs tightly in foil and bake for 2 hours or until cooked through. When the ribs are done, discard all of the liquid. Spread a layer of barbecue sauce on the ribs and then place them back into the over for ten minutes. Repeat this step two or three time to build a layer of barbecue sauce on the ribs. You can also just place the ribs under the broiler in the oven for a few minutes to stick to the ribs.


Saturday, February 18, 2017

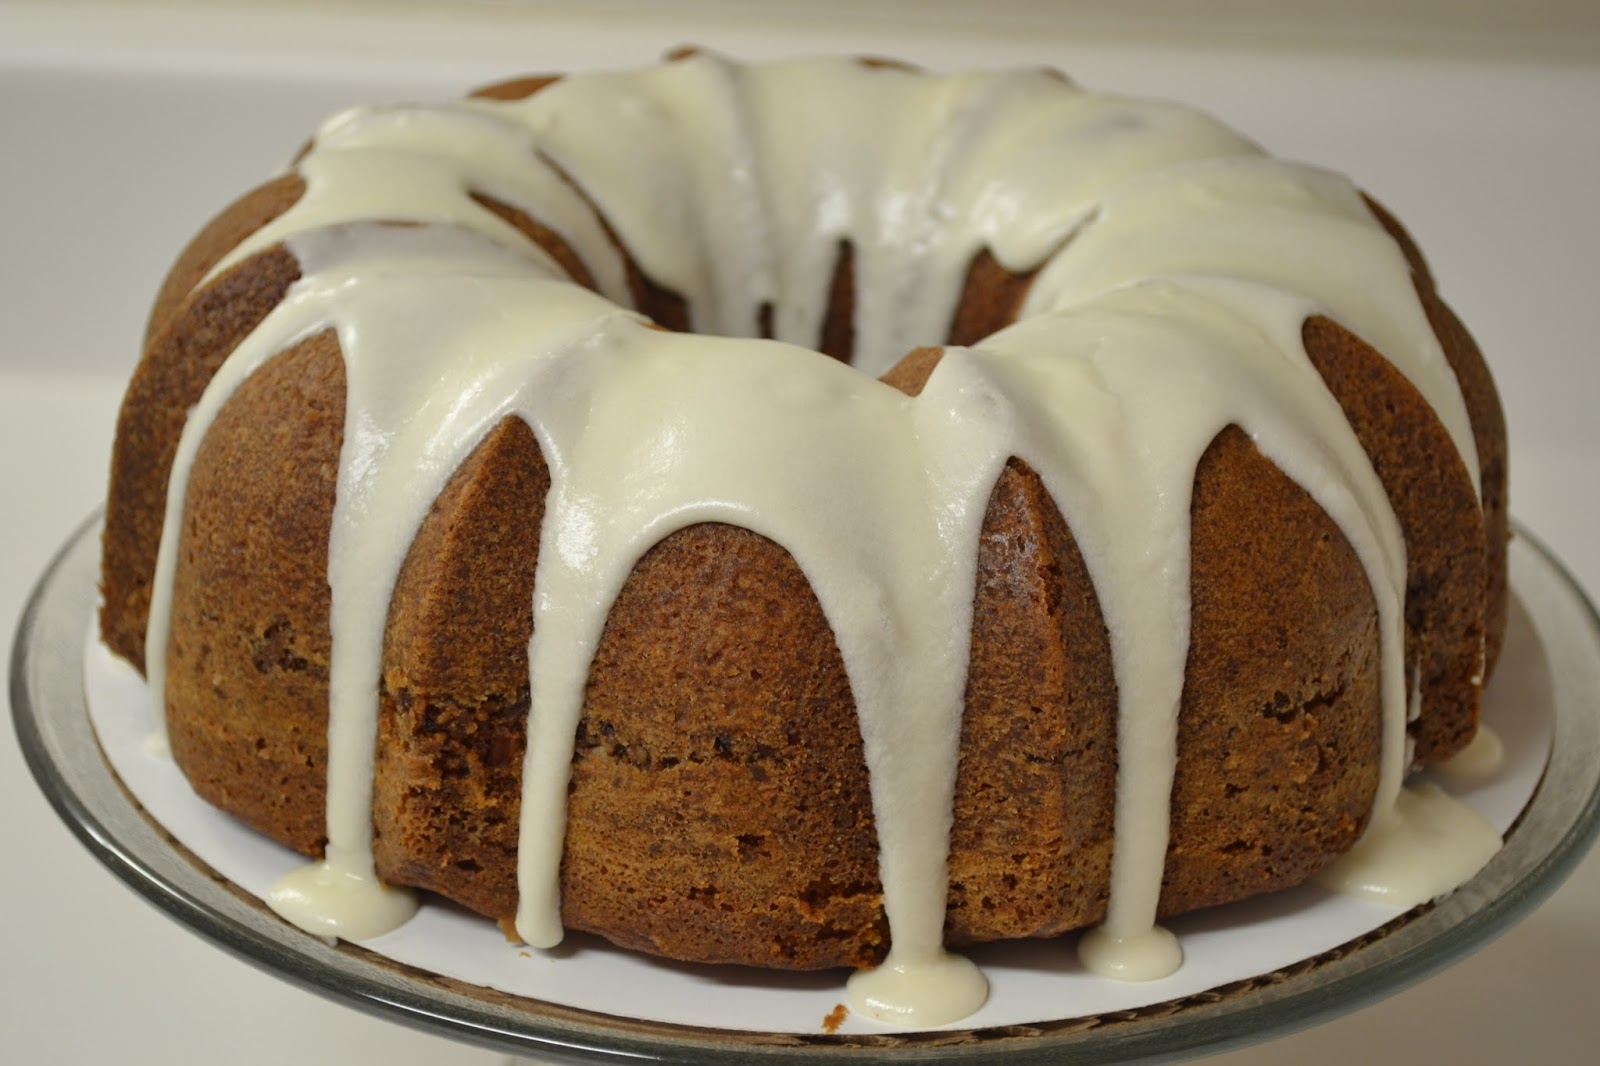
6 Flavor Butter Cake


What's up foodies. Y'all doing good? You good? You good? I'm good! You good? Okay, good. Today I am going to share my recipe for a 6 flavor Butter Cake. I am pretty sure you have heard of the Kentucky Butter Cake and I figured it was time I made my version of it.

This cake is essentially like a pound cake, the only difference is there isn't a pound of each ingredient and this cake has a delicious butter sauce that goes over it once it's cooked. I have been making this cake for the past couple of weeks to get it just like I want it. I will say that just like a pound cake, this cake tastes better the next day. I don't know why, it just does.

My recipe is not that different from any others, but I do like the variety of different flavorings in it. Although I have the flavorings listed, you don't have to use what I have. Use what you want and it will be fine. You'll notice on some of the stronger flavorings, I only added half a teaspoon, but you may use a whole teaspoon if you wish. I strongly encourage you to only add 1/2 teaspoon of the maple extract as it overpowers everything else.

I really hope you enjoy this cake. I have received some really good feedback from the people I have shared it with, considering I have made 4 or 5 of them the past two weeks while I was perfecting the recipe.

Recipe

For the Cake:

- 2 sticks butter, softened
- 4 eggs, room temperature
- 2 1/4 cups sugar
- 1 cup buttermilk, room temperature
- 2 3/4 cups all purpose flour
- 1 tsp. baking powder
- 1/2 tsp. baking soda
- 1/2 tsp. salt
- 2 tsp. vanilla extract
- 1 tsp. butter flavoring
- 1 tsp. rum flavoring
- 1/2 tsp. maple flavoring (use 1 tsp. if desired)
- 1/2 tsp. coconut flavoring (use 1 tsp. if desired)
- 1/2 tsp. almond extract (use 1 tsp. if desired)

Butter Sauce:

- 6 tbsp. butter
- 2 tbsp. water
- 3/4 cup sugar
- 2 tsp. vanilla extract

Directions:

Cake

Preheat oven to 350 degrees. Butter and flour a bundt pan. Sift together the flour, salt, baking powder, and baking soda. In a bowl, mix together the butter ans sugar until fluffy and well combined. Add eggs one at time. Add one third of the flour mixture and mix. Add half the buttermilk and all of the flavorings and mix. Repeat steps until flour and buttermilk are combined. Pour batter in prepared pan and bake for 50 to 55 minutes or until a skewer or toothpick inserted into the center comes out clean. Once the cake comes out of the oven, poke holes in it using a skewer or butter knife. Poor the butter sauce over the cake. Let the cake cool completely in the pan.

Butter Sauce

In a saucepan over medium low heat, add the butter, water, sugar, and vanilla and mix until the butter is melted and sugar is dissolved (DO NOT BOIL).

Wednesday, November 2, 2016

Biscuits and Gravy


What's up foodies? Y'all doing good? You good? You good? I'm good. You good? Okay, good. Well. today I am sharing my recipe for biscuits and gravy. This should have been posted three weeks ago, but I got so busy and distracted.

Biscuits and gravy is easily one of my favorite breakfast items to eat. It's simple and very delicious. About a month ago, I shared recipe for buttermilk biscuits, which you can find here. These biscuits are the perfect base for this sausage gravy.

You will see below that the measurements for the salt and pepper are to taste. I did that because when making any kind of gravy, you add a little salt and it seems bland, but as the gray cooks, the flavor comes out more. So I have left the salt and pepper up to you because the gravy can go from super bland to super salty in a snap (I know from experience).

Notes:
- If the sausage you use renders a lot of fat, you may not need to add the butter.
- If gravy gets too thick, add a little more milk.

Recipe:

Gravy:
- 1 pound ground sausage
- 2 tbsp. butter
- 3 tbsp.flour
- 4 cups milk
- 1/2 tsp. ground sage
- salt and pepper to taste.

Get buttermilk biscuit recipe here.

Directions:

In a skillet, cook sausage over medium heat, crumbling up with spoon. Once sausage is full cooked, add in butter an stir until melted. Add in flour and stir about 2 minutes until flour has dissolved and most of the flour taste has cooked out. Add in milk and bring to a simmer for about 5 minutes stirring occasionally. Add in the salt, pepper, and sage and cook for an additional 5 minutes over medium heat or until desired thickness is reached. 


Wednesday, September 28, 2016

Buttermilk Biscuits


What's up foodies? Y'all doing good? You good? You good? I'm good!You good? Okay, good. Today I'm sharing my recipe for buttermilk biscuits. Now, I already have another biscuit recipe on my blog that is a little different from this one, but I figured, everyone needs a good buttermilk biscuit recipe, right? 

I love a good biscuit and these really hit the spot. I'm not just saying that because it's my recipe either. In this  recipe, I used both butter and shortening, I feel this just adds to the overall flavor of the biscuits. I have another recipe coming up within the next week that will go perfectly with these biscuits.

I hope you enjoy the recipe, and if you try them, please let me know what you think.

Ingredients:
  • 3 1/2 cups self-rising flour
  • 1 tsp. baking powder
  • 1 tsp. salt
  • 1 3/4 cups buttermilk
  • 2 tbsp. sugar
  • 4 tbsp.butter
  • 4 tbsp. shortening (cold)- [butter flavored if you can find it]
  • 2 tbsp. melted butter
Directions:
Preheat oven to 425 degrees. In a bowl whisk together the flour, salt, sugar, and baking powder. Cut in butter in shortening with pastry blender or two forks until the butter and shortening are in small crumbles. Make a well in the middle of the bowl and pour in buttermilk. Gently mix until dough forms. Pour the dough out onto floured work surface and knead until it comes together. Using a floured biscuit cutter, cut the biscuits closely together.  Place biscuits onto baking pan and brush the tops with melted butter. Placed into preheated oven. Bake for 15 to 20 minutes or until golden brown.


Friday, July 29, 2016

Homemade Sock It To Me Cake


What's up foodies? Y'all doing good? You good? You good? I'm Good! You Good? Okay good. Today, I am sharing my recipe for homemade sock it to me cake. Now, I'm not sure why it's called sock it to me, but what I do know is that it is very good.

I remember eat these all the time when I was younger and up until about four months ago, I haven't had one in a very long time. I was in Walmart in the bakery section and I saw a sock it to me cake. Long story short I bought it and became addicted. I realized that as soon as I finished one, I was buying another one. So I decided to make my own version of it.


So, a few weeks ago, I started developing the recipe. After making it three times, I finally got the recipe just how I like it, I gave some to my sister (who was also addicted to the Walmart brand) she said she loved it and that it tasted just like the ones from Walmart. Now, I will be honest and say that mine doesn't taste just like theirs, but it is just as good.

Recipe

Cake
- 12 tbsp butter, softened 
- 3 cups sugar
- 1/3 cup vegetable oil
- 4 eggs
- 2 1/4 cups all purpose flour
- 2 tsp. vanilla
- 1/2 tsp. baking powder
- 1 1/4 cups buttermilk
- 1/2 tsp. ground cinnamon
- 1 (3.4 ounce) pack vanilla pudding (or french vanilla)
- 1/2 tsp. salt

Filling
-3 tbsp. brown sugar
- 1 tsp. cinnamon
- 1/2 cup choped pecans

Glaze:
- 2 cups powdered sugar
- 3 tbsp. butter, softened 
- 4 to 7 tbsp. milk

Directions:
Preheat oven to 325 degrees. In a bowl beat butter and sugar until fluffy. Add eggs one at a time, beating until egg is combined. Add vegetable oil and vanilla extract and mix. In another bowl, mix the flour, salt, cinnamon, and pudding together. Add in one-third of the flour mixture to the butter mixture and mix. Add in half the buttermilk and mix. Repeat steps until flour and buttermilk are mixed in. In a small bowl, mix the brown sugar, cinnamon and pecans together. Place half the cake batter into a prepared tube pan. Sprinkle the top with the filling mixture. Add the remaining cake batter and smooth out. Bake in preheated oven for 55 minutes to 1 hour. When cake comes out of the oven, let it sit in the pan 15 to 20 minutes, then remove cake from pan and continue cooling for about an hour. Mix the powered sugar and butter together. Add milk just until the glaze is thick, but still runny. Spread glaze over cooled cake. 

Saturday, May 7, 2016

Bourbon Chicken


What's up foodies? Y'all doing good? You Good? You Good? I'm good! You good? Okay, good? It has been a while since I have posted a recipe, and so today I am back with this delicious Bourbon Chicken recipe. 

I must add that this bourbon chicken does have bourbon in it, which I know traditionally bourbon chicken doesn't have bourbon in it. The recipe got its name because it was originally made on bourbon street, but I decided to add in some bourbon.

If you do not want to add the bourbon, you can leave it out, but keep in mind that the alcohol is going to cook out.

Ingredients: 
- 3 pounds boneless, skinless chicken thighs (or breast)
- 3 tsbp. bourbon
- 1/4 cup brown sugar
- 1 clove garlic, minced
- 1/3 cup apple juice (I sometimes use 2/3 cups)
- 2 tsp Worcestershire sauce (optional)
- 3 tbsp. ketchup
- 2 tsp. apple cider vinegar
- 1/4 cup water
- 1/3 cup soy sauce
- 1/4 tsp. ginger paste (or minced ginger)
- 3 tsp. cornstarch 
- 1 tbsp. vegetable oil

Directions:
Cut the chicken thighs into 1-inch cups. Add the oil into a skillet and place over medium heat. Once the oil has come up to temperature, add in the chicken and cook until browned (about 3-4 minutes). Once the chicken is browned, remove from skillet. In a separate bowl, mix together the water and cornstarch until combined and no lumps are visible. Add in the remaining ingredients and stir until well combined. Place the sauce into a skillet over medium heat and let it come to a light simmer. Once the sauce comes to a simmer, add in the chicken and cook for 15-20 minutes. Serve with rice and enjoy. 


Saturday, March 19, 2016

Vegetable and Beef Soup


Whats up my fellow foodies? Are you good? You good? You good? I'm good! You good? Okay good. Well, today I am sharing my recipe for vegetable and beef soup. I wanted to get this recipe and the video posted back in the colder months, but like usual, most things don't always go as planned. So even though we are starting to transition into the warmer time of the year, I still wanted to post this recipe.

Although, were I am, we still have a few more cold days left and that's why I decided to post this. After all, who says you can only have soup during the colder months? This soup is so basic and easy, but It tastes so good. Keep in mind while making this that you do not have to use everything that I am using. Make it your own and put what you want in it! It is pretty hard to mess up soup. If you've ever made any type of soup before, then you probably know that it always tastes better the next day, so I strongly advise making this ahead of time. I really hope you enjoy this recipe.

Recipe:
- 1 to 2 pounds ground beef
- 1 (29 ounce) can mixed vegetables
- 1 (29 ounce) can diced tomatoes (undrained) 
- 1 can corn
- 1 can sweet peas
- 1 can tomato sauce
- 1 onion, diced
- 2 stalks celery, chopped
- 1 clover garlic, minced
- 1 cup frozen okra (optional)
- 1 potato diced (optional)
- 1 tbsp, vegetable oil 
- 1 pack Knorr vegetable recipe mix (optional)
- 1 tsp. oregano
- 2 cups chicken broth
- 4 cups water
- salt and pepper to taste

Directions: 
Brown the ground beef. When fully cooked, drain fat. Saute the onion in the oil until the onion is translucent. Add in the garlic and saute for about two minutes. In a big pot or dutch oven, add the ground beef, the onion, celery, and garlic mixture, tomatoes, mixed vegetables, corn, peas, tomato sauce, okra, and potatoes. Add in the chicken broth and water. Sprinkle in the vegetable recipe mix and oregano. Season with salt and pepper. Add the lid, and with the heat on medium low, let the soup cook for about 1 hour to 1 1/2 hours. After that taste the soup to see if it needs more salt or pepper.

Serve the soup with crackers or cornbread and enjoy.


Wednesday, January 27, 2016

Cinnamon Rolls


CINNAMON ROLLS

What's up foodies? Y'all doing good? You good? You good? I'm good! You good? Okay, good! Today I'm going to share my recipe for cinnamon rolls. Cinnamon rolls are one of my favorite sweet things to eat. There is just something so amazing about the soft dough, sweet filling, and the amazing cream cheese glaze on top.

As much as I love cinnamon rolls, I don't make them too often because I know how I am around them. I eat one, and one turns into two, and so on and so forth. For the past two weeks, I have been working on this recipe and I got it exactly how I want it. Now, I will admit, making cinnamon rolls is  a bit of a process, and I am no stranger to just hitting up the dairy section at my local grocery store and grabbing a can of Pillsbury cinnamon rolls. There is, however, a sense of pride when you make them yourself.

To be honest, After testing and trying to perfect my own recipe for cinnamon rolls these past two weeks, I am pretty sick of them at the moment, but I'm sure I'll be back to loving them again soon.

Okay, enough of me...let's get to the recipe.

NOTES:

  • It is very important that your water is warm. If it is too hot, it will kill the yeast and the dough will not rise. The easiest way to test is to place your finger in the water. When you do, the water should be warm to the touch. If you have to snatch your finger out because of the heat, it's too hot.
  • If you want to make the cinnamon rolls in a mixer with a dough attachment, that is fine, but if you're using a spoon, after a while you might need to knead the flour in by hand if it is too hard to mix with the spoon.
  • The warm place I like to put my dough is in the microwave or in the oven with the oven light on.
  • You can use regular milk instead of half and half.
  • Make sure the yeast you're using is not expired.


Ingredients:

Dough:
-1/2 cup warm water
- 2 tsp. sugar
- 1 pack (2 1/4 tsp.) active dry yeast
- 4 1/2  to 5 cups flour (all purpose of bread flour)
- 1 tsp. salt
- 5 tbsp. melted butter
- 2 eggs
- 1/3 cup sugar
- 1 cup half and half
- 2 tbsp. vegetable oil
- 1/2 tsp. vanilla extract (optional)

Filling: 
- 1 cup brown sugar
- 2 tbsp. cinnamon
- 4 tbsp. softened butter

Cream Cheese Glaze:
- 4 ounces cream cheese (softened)
- 4 tbsp. butter (softened)
- 2 to 4 tbsp. half and half
- 1 tsp. vanilla extract
- 1 cup powdered sugar

Directions:
Stir together the warm water, 2 teaspoons of sugar, and pack of yeast. Let that sit and proof for five minutes (it should look foamy after five minutes). Mix together the flour and salt. In a mixing bowl, add the melted butter, half and half, eggs, vanilla, sugar, and oil and mix those together. Add in the yeast and water mixture and stir. Using a wooden spoon or mixer with dough attachment. Add in the flour a little at a time until a dough forms *see notes*. Knead the dough a few times by hand until it comes into a smooth ball. Place the dough into a bowl that has been greased with oil. Cover the bowl with plastic wrap and place into a warm place to rise for 1 to 1 1/2 hours or doubled in size *see notes*.

Once the dough has risen, punch it down to release the air and turn out onto work area. Using a rolling pin, roll the dough out into a rectangle about 14 inches tall and 20 inches wide. Mix together the brown sugar and cinnamon very well. Spread the softened butter all over the inside of the dough. Sprinkle the brown sugar and cinnamon mixture on top of the butter, leaving a 1/2 inch border on all sides with no cinnamon sugar. Starting with the longest end, roll the dough up really tight. Slice the rolls into 1 inch pieces using a serrated knife. Place the rolls into a greased 9 x 19 inch pan and cover with plastic wrap. Let the rolls rise for 45 minutes to an hour in a warm place. Once the rolls have risen, remove the plastic wrap and place into a preheated 350 degree oven and bake for 18-20 minutes or until golden brown.

Cream Cheese Glaze:
Mix together the softened butter and cream cheese until combined. Add in the vanilla and powdered sugar and mix until the sugar is incorporated. Add in the milk or half and half until it is a thick, but runny consistency. Spread the glaze over the hot rolls.


Sunday, December 27, 2015

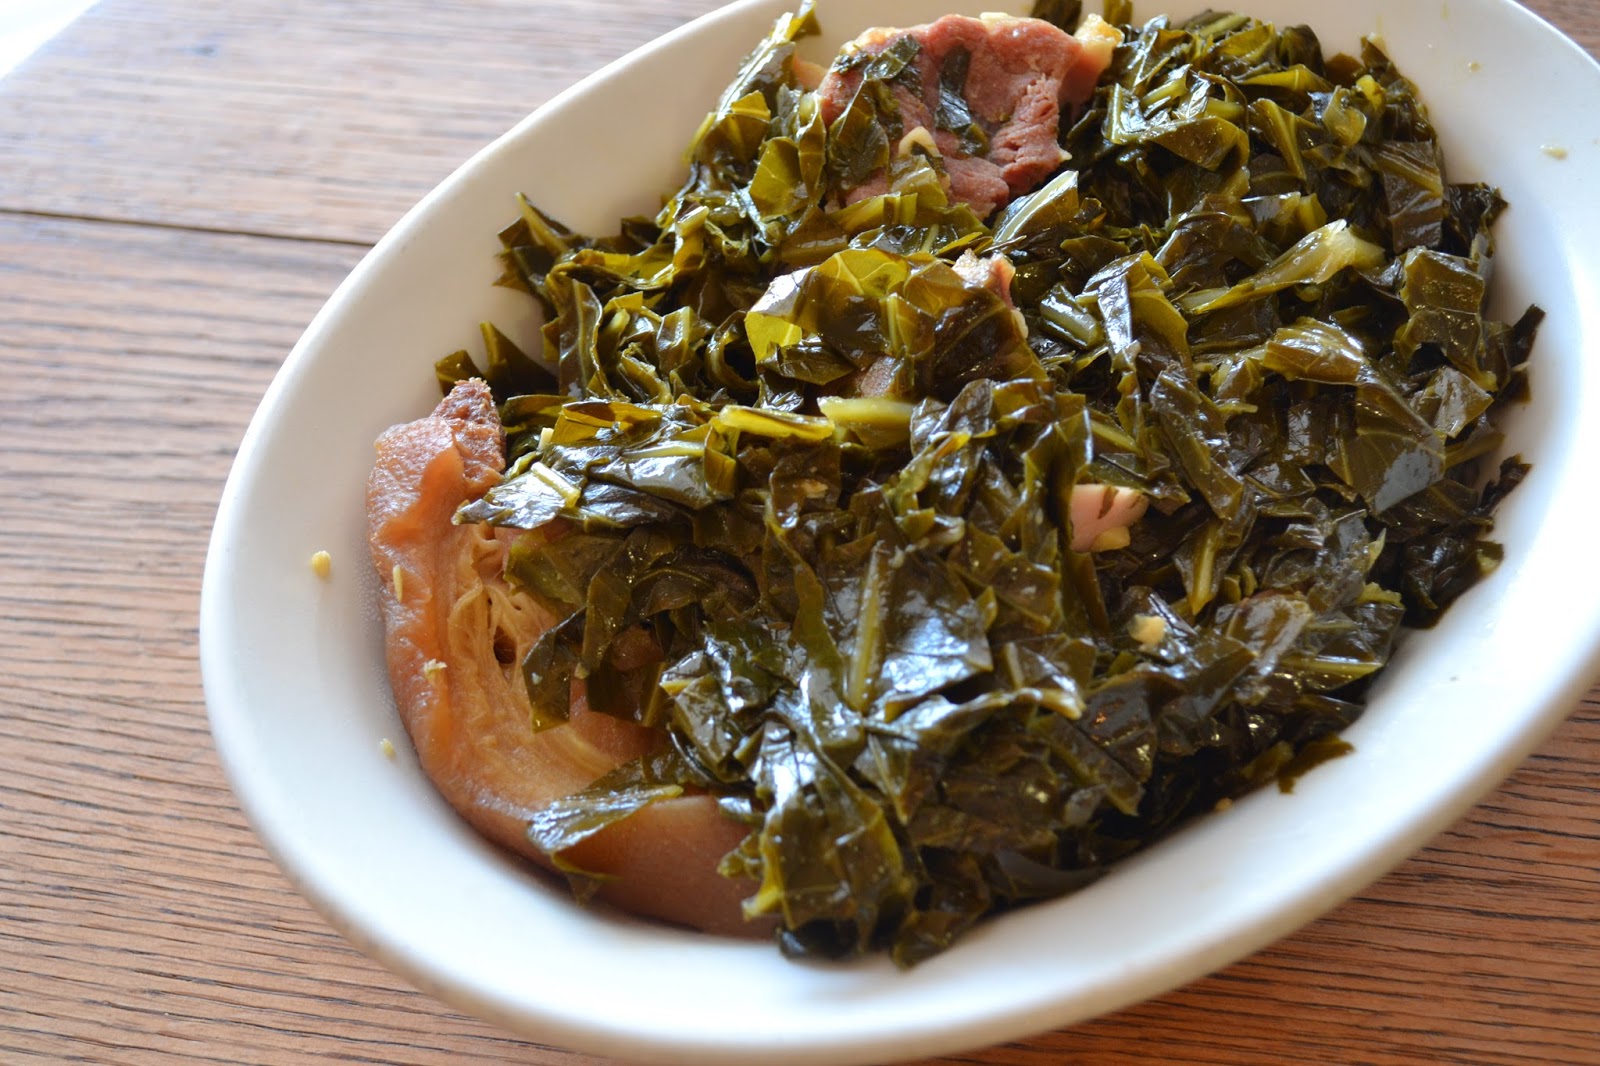
Collard Greens


What's up foodies? Are y'all good? You good? You good? I'm good! You good? Okay, good. Today I'm sharing my recipe for collard greens. Now, when I was younger, I really didn't like collard greens or any other green vegetable for the matter, but it's one of those things that you grow out of.

There are several different ways you can make collard greens. What I do may differ from what others do.

Recipe:
- 1 large bunch fresh collard greens
- 2 or 3 pieces ham hocks  (or meat of choice)
- 2 cloves garlic, minced
- 4 cups chicken broth
- 1 tbsp. vinegar
- 1 tablespoon vinegar
- salt to taste

Directions:

Start by rinsing the entire outside of the greens and then start peeling the leaves apart and wash each leaf very thoroughly with cold water. Once all the greens are washed, start removing the leaves from the stem. You can do this by positioning your middle finger and thumb on each side of the greens and index finger down the stem and the run your middle finger and thumb down the greens (refer to video). Do this for all the greens.

After removing the greens, stack about 3 or 4 greens on top of each other and then roll them all together really tightly and start to slice the about 1/4 of an inch. When the greens are all cut, place them in a strainer and rinse the once again with cold water.

On medium heat, saute garlic for about one minute. Slowly add in the chicken broth and bring to a simmer. Add in the ham hocks or meat of choice and let that simmer, covered for about five minutes. Add in the collard greens, place the lid on and cook for 15 minutes. After fifteen minutes, add in the sugar and vinegar and season with salt and give it a stir. Replace lid and cook for another 15 minutes. Continue to stir the greens every 15 minutes for about 1 hour to 1 hour and 15 minutes or until the desired texture of the greens is reached. Adjust seasoning after the greens are finished.

If you prefer, you can remove the ham hocks and cut the meat off and add it into the greens.

Please remember to check out the video and don't forget to subscribe to my YouTube channel.


Tuesday, November 10, 2015

Lemon Pound Cake

Recipe By: Devin Judkins

Hello all my foodies out there. Are you good? You good? You good? I'm good! You good? Okay good. Today I am sharing my recipe for a homemade lemon pound cake. It's coming up on my 1 year YouTube anniversary of my cooking channel and I decided what better way to celebrate by sharing a different version of my first video I posted on my cooking channel, which was my regular all butter pound cake. Check that out here.

A few weeks ago, someone asked me if I could make them a lemon pound cake and so I said to myself "Why not film it and post it to my cooking channel?" because at the time I still hadn't figured out which of my recipes I wanted to share next. The person also wanted the cake in loaf form, which is why I made it like this.

Now, the cake that you see in the picture is just a small version of this recipe. When I made the cake, and took the pictures for this blog and for the thumbnail on my cooking channel, I didn't like them, so I made a smaller version to take new pictures. This recipe is for a FULL pound cake. I used a 16 inch loaf pan to make the original cake, but this can also be made in a regular bundt cake pan.

If you've made my regular pound cake, you will see that there isn't too much of a difference between that recipe and this one. I don't like to make recipes too complicated. I like to create a base recipe and add to it to enhance and improve it.

I have made this cake both in a bundt pan an obviously in the loaf pan, and there isn't really a difference in the cook time. I really hope you enjoy this recipe. I get lots of compliments on it. Happy baking.

Cake Ingredients
- 3 sticks unsalted butter, softened
- 3 cups sugar
- 6 eggs, (room temperature) [separated while cold]
- 1 tsp. vanilla extract (optional)
- 1 tsp lemon extract
- 1/2 cup fresh lemon juice
- 1 cup heavy cream, room temperature
- 1/2 tsp. baking powder
- 3 cups cake flour
- 1/2 tsp salt

For the glaze
- 1 cup powdered sugar
- 2 tsp. lemon juice
- 1 to 2 tablespoons milk

Directions:
Preheat oven to 325 degrees. In the bowl of your mixer, beat the butter and sugar until fluffy and combined. Next, add in the egg yolks one at a time mixing only until the yolk is mixed into the batter. Add in the vanilla extract, lemon extract, and lemon juice and mix well. Mix together the flour, salt, and baking powder in a bowl and then alternate adding the flour and the heavy cream. Start with the flour, and end with the flour. Place the egg whites in a bowl and with your mixer on high speed, beat the egg whites until they form stiff peaks. Gently fold the egg whites into the cake batter. Pour the batter into prepared pan and smooth it out evenly. Bake in preheated over for 1 hour to 1 hour and 15 minutes or until a skewer inserted in the middle comes out clean. When the cake comes out of the oven. Let it cool in the pan for 15 to 20 minutes and then run a butter knife around the sides to loosen it up and then flip the cake out onto a cooling rack to cool completely. Mix the ingredients for the glaze and spread it over the cooled cake.

Friday, October 16, 2015

Chocolate Rice Krispies Treats

What's up foodies? Are you doing good? You good? You good? I'm good! You good? Okay good. Today I'm posting something a little fun for Halloween. Chocolate Rice Krispies Treats. Now, this idea is something that I came up with a little while ago, but I decided to wait and save it until closer to Halloween.

This isn't too innovative, I'm pretty sure this has been done before, but I think its fun for Halloween. When I originally thought of these, I was wondering how I could get all the chocolate to cover the rice krispies cereal, and then I remembered that they sell cocoa krispies and my problem was solved. Now, if you don't have cocoa rice cereal in your area, I suggest that you take regular rice cereal, place them into a plastic bag and then spray the cereal with cooking spray and then pour in some sweetened cocoa and mix them all together. I haven't tried that, so I can't tell you how it will work, but it's worth a try. You can also just use regular rice cereal.

Notes:
- It's very important that you keep your stove heat on low to prevent burning the chocolate and the marshmallows.
- I melted and colored some white chocolate to spread on top of them when they were finished.

Recipe:
- 4 cups mini marshmallows
- 4 tbsp. butter
- 1/2 cup chocolate chips, melted (milk chocolate or semisweet chocolate)
- 5 cups cocoa krispies cereal
- 1 tsp vanilla extract
-1/4 cup mini chocolate chips (optional)

Directions:
In a pot over low heat, melt the butter. When the butter is melted, add the marshmallows and vanilla extract and stir until the marshmallows have melted. Add in the melted chocolate and mix it in until combined. When the chocolate is combined, remove the mixture from the heat and add the cocoa krispies cereal and stir really well to combine everything. If you choose, you can add the mini chocolate chips when you add the cereal. Once everything is well combined, pour the mixture into a greased 9x9 or 13x9 inch pan and pat down evenly using a greased rubber spatula or clean hands. Let the treats set to firm about 10 to 15 minutes and then slice and serve.

Friday, September 11, 2015

Strawberry Swirl Cheesecake


Recipe By: Devin Judkins

What's up foodies? Are you doing good? Okay, good. Well, today I am sharing my recipe for my all-time favorite dessert, Cheesecake. I really love cheesecake. I could eat it all day, everyday day. When I go to a restaurant and order dessert, you can bet if there is a cheesecake on the menu, I'm going to get it.


Now, my recipe doesn't stray too much from any other cheesecake recipes. This is a baked cheesecake, so you will have to cook it in the oven. Personally, I prefer a baked cheesecake over a no bake cheesecake because of the texture. I love the fluffy yet dense texture that you get from a baked cheesecake versus the creamy texture you get from a no bake cheesecake. I understand that not everyone likes a baked cheesecake, so I will be sharing a no bake cheesecake in the future.

Some people like to use either sour cream or heavy cream in cheesecake recipes. I like to use a combination of them both. It makes for a great texture.


Tip: If you are like me, you've had a problem with your cheesecake crust sticking to the pan. I saw on another website that if you add a piece of parchment paper into the bottom of the pan and then add your crust it will prevent the crust from sticking. I tried this out with this recipe and it works.

Notes:
- You can leave out the strawberry sauce and this makes a great plain cheesecake.
- You don't have to cook the cheesecake in a water bath, but it does help prevent cracks, if you choose not to use the water bath, you won't need the foil around the pan.
Recipe:

Crust:
- 1 1/2 cups cookie or graham cracker crumbs
- 5 tbsp. butter, melted and cooled
- 2 tbsp. sugar
- 1/4 tsp. cinnamon (optional)

Filling:
- 4 8-ounce packages cream cheese, softened
- 1 1/4 cups sugar
- 4 eggs, room temperature
- 1 cup sour cream
- 1/4 cup whipping cream or heavy cream
- 2 tsp. vanilla extract
- 1 tsp. lemon juice (optional)
- 1/4 cup flour
- 1/3 cup strawberry sauce get recipe
- Pot of boiling water

Directions:
Preheat oven to 350 degrees.

For the crust: Butter the bottom and sides of a 10 inch spring form pan and wrap the outside of the pan twice with aluminum foil. Crush the cookie or graham crackers using the food processor or by placing them into a plastic bag and crushing them with a rolling pin or can of vegetables. Place the cookie crumbs into a bowl and add the melted butter, sugar, and cinnamon if you choose and stir until combined. Pour the crust mixture into the pan and press the crust into the bottom of the pan using your hands or a cup until flat and even. Place the crust in the refrigerator while you make the filling. 

For the filling: Beat the cream cheese just until it loosens up a little and then mix in the sugar until all combined. Add the vanilla and lemon juice and mix. Remember to scrape the sides of the bowl. Next, add in the eggs one at a time, mixing only until each egg is combined. Add the heavy cream and sour cream and mix until combined. Add in the flour and mix. After the flour is mixed in, give the bowl a good stir to make sure everything is combined. Pour the batter over the crust and smooth out. Place teaspoons of the strawberry sauce all over the top of the cheesecake. Using a butter knife, make swirls through the batter. Place the cheesecake into a roasting pan and carefully pour the boiling water into the roasting pan. You want enough water to come up about half way of the spring form pan. Bake for 50 minuter or 1 hour and 10 minutes, keeping a check on it. When the cheesecake is done, the outer layer ring of the cheesecake should be firm, but the center should have a little jiggle to it. Let the cheesecake cool completely on the counter (1 1/2 to 2 hours) and then place in the refrigerator for overnight to set.


Saturday, September 5, 2015

Slow Cooker Strawberry Sauce

Recipe By: Devin Judkins

Ingredients:
- 1 pound fresh strawberries
- 1/4 cup sugar
- 2 tsp. cornstarch
- 1 tbsp. plus 1 tsp water
- juice of half a lemon
- splash of vanilla extract (1/4 tsp.) [optional]

Directions:

Wash strawberries really well with cold water. Remove the tops of the strawberries and slice them. Place the strawberries into the slow cooker. Mix together the cornstarch and water. Add the sugar, cornstarch and water mixture, and the vanilla extract in with the strawberries and give them a stir. Put the slow cooker on low temperature and cook for 1 1/2 hours to 2 hours, stirring every 20 or 25 minutes. When the strawberries have cooked down and thickened, remove from the heat and let cool. Place the strawberries into the food processor and process until smooth. Run the sauce through a strainer to remove the strawberry seeds. Place in an airtight container into the refrigerator for about a week.

Notes:
- You can also do this on the stove in a saucepan, just make sure the stove is on low temperature. 

Saturday, August 22, 2015

(BLFGT) Bacon Lettuce and Fried Green Tomato Sandwich


I am almost afraid to post this because it isn't really a recipe.

Ingredients:
- 2 fried green tomatoes
- 2 slices of bacon (thick)
- Lettuce
- Sandwich bread
- Ranch dressing or mayo

Instructions:
Fry your green tomatoes. Get fried green tomatoes recipe here. Cook the bacon. When the tomatoes and bacon are done, assemble the sandwich. Spread a layer of ranch dressing or mayo on the bottom of the bread and then add the bacon lettuce and green tomatoes.